

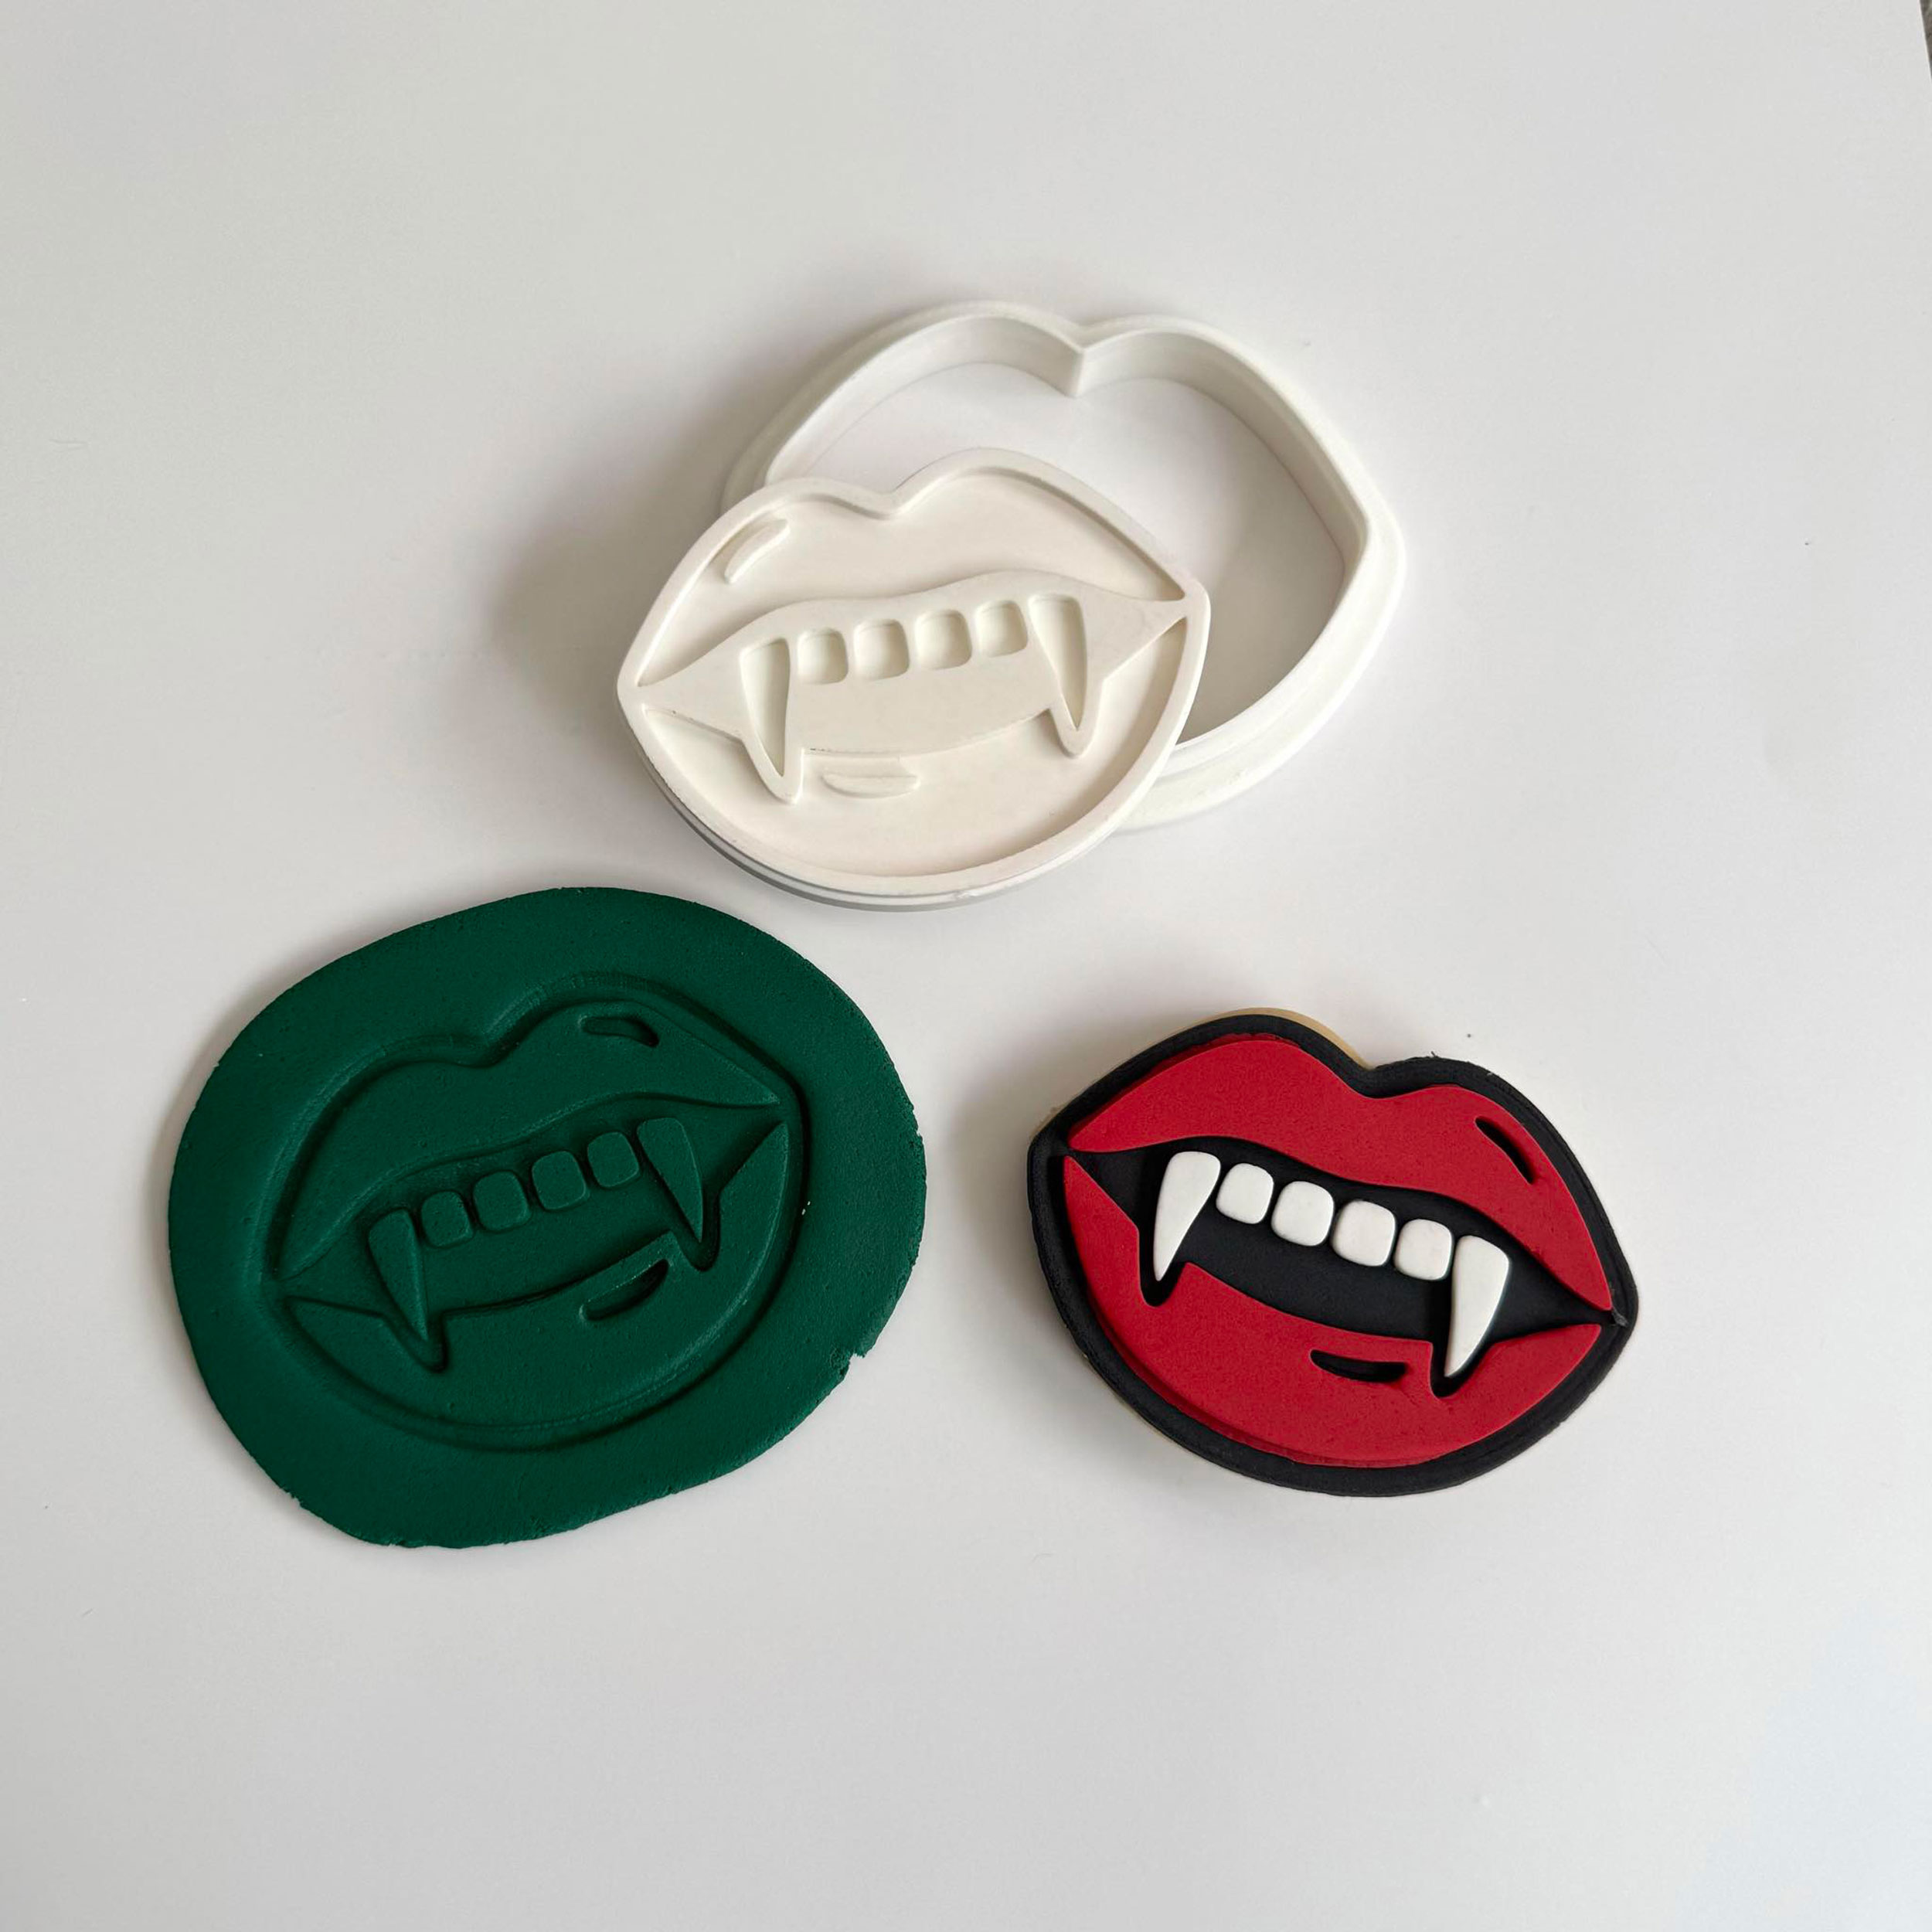
Vampire Fang Lips Halloween Cookie Stamp and Cutter
Bold, cheeky, and just the right amount of spooky – the Vampire Fang Lips Cookie Stamp is the Halloween party piece your cookies have been waiting for. That dramatic pout with sharp fangs? Undeniably bite-worthy.
What makes this cookie stamp stand out?
Made in-house using high-quality, food-safe material, this stamp and cutter set gives a clean embossed (raised details on the cookie surface) result with every press. The crisp linework brings those sharp vampire fangs and sultry lip shape to life, making it one of our most eye-catching Halloween designs. It's 3D printed and beginner-friendly – no special tools needed for a pro finish.
When should I use this design?
This one’s a Halloween showstopper! Ideal for spooky cookie boxes, party platters, gothic glam treats or even Twilight-themed bakes. Pair it with our other Halloween cutters for a wickedly fun cookie collection. This fangy favourite brings a kiss of fright to any sweet setup.
How long will it last me?
Our 3D printed stamp and cutter sets are strong, reusable and made to order right here in our studio. These lips may be full of attitude, but they’re also easy to clean and store. We recommend snapping it up before Halloween – designs this bold rarely stay in stock long!
What size cookie does it make?
Measurements – approx. 80mm wide x 60mm high
Stamp – embossed (raised details on the cookie surface)
Explore More from Our Range:
FAQs
Do the fangs come out clearly when stamped?
Yes! The embossed design gives bold, raised details that show up beautifully on fondant or similar decorating mediums.
Can I buy the stamp or cutter separately?
Absolutely – choose from stamp only, cutter only, or the full set. The cutter follows the lip outline for a perfect fit.
Will this work for themed party boxes?
It’s perfect! The lips are dramatic, fun and unexpected – ideal for Halloween, vampire parties, or gothic bakes.
How should I store it?
After washing and drying, store in a cool, dry place away from direct heat. These tools are built to last season after season.
Cookie Decorating Made Simple
1. Prepare Your Fondant
- Knead your fondant until smooth and pliable. PRO TIP – microwave it for 5–10 seconds at a time until soft.
- Dust your bench with cornflour and roll out to 2.5–3mm thickness.
2. Transfer Your Design
- Lightly dust the stamp with cornflour to prevent sticking. PRO TIP – use a paintbrush for finer details.
- Press the stamp firmly into fondant with even pressure. PRO TIP – use a rolling pin for best results.
- Lift the stamp carefully to reveal your design.
3. Add to Your Cookie
- Use the matching cutter to trim the fondant.
- Attach to your cookie. PRO TIP – mix equal parts sugar and boiling water to make sugar syrup glue.
Care Instructions
- Handwash only: Wash gently with warm, soapy water before and after use.
- No soaking: Avoid prolonged exposure to water.
- Dry completely: Air dry before storing.
- Heat sensitive: Not dishwasher safe. May warp in hot water or high heat.
- Use a soft-bristle brush (like a toothbrush) for intricate cleaning.
Always ensure your cutters and stamps are clean and dry before using.


